Trading tips for gutting, transferring, and carving the real thing.
User avatar
By S.A.M
#7075
I've never thought about gluing the pattern and cutting through it before reading this, what a great idea! I've always used the dot to dot method and it's a really tedius time consuming job that I hate, so I will be giving this new method a try this year, thanks.
User avatar
By cyberdman
#7078
Trust me, you will be so glad you did.
User avatar
By Tkaraoke
#7079
It's not that I hate poking the pattern...in fact I find it quite relaxing but as I poke I'm always thinking there had to be a quicker way to do this. By the time it takes to poke a complex pattern on a pumpkin you could probably be half way finished carving one using the "stick on-n-carve" method.
:lol:
User avatar
By 2manyferrets
#7106
I have only used the glue method on the fake pumpkins, but I must try it on a real one this year. For some reason I can see it getting all ripped and mushy with the pumpkin juice though. Does it work well with the shaded patterns? Do you outline it with an exacto knife and then shade? Ive had issues with using an exacto knife, maybe I should try sharpening it huh?? :roll:
User avatar
By cyberdman
#7108
I have glued real pumpkins and it works great - although I do not know about shaded patterns. I have yet to try that.
User avatar
By cyberdman
#7112
Yeah I'm your stalker!!!

No, seriously I just keep track of the discussions I participate in.
User avatar
By Tkaraoke
#7114
Man, I wish I was cool enough to have my very own stalker! Perhaps some day...
:lol:
User avatar
By Dans banana Loafcake
#7116
Tkaraoke wrote:Man, I wish I was cool enough to have my very own stalker! Perhaps some day...
:lol:
Dude I'm not stalking anyone at the moment so if you want I could stalk you. You'd have to pay for my plane ticket to the states though :D

Dan
By njevans
#7289
Hey guys! Look in the plastic wall stencil aisle at the craft store. A company called "Plaid" makes a stencil adhesive. Spray on the back of the stencil (don't soak paper) and allow it to dry for about 3 minutes or so. Then stick it to the pumpkin. It will leave very little sticky on the pumpkin. May be a better choice for faux pumpkins. The adhesive is designed for walls, so that it doesn't leave a residue on a matte finish.

I started using this at first for stenciling. I would find a design, print it out on paper, cut it out with a mat and exacto knife. It worked great for stencils I would only be using once and for placed a bunch of stencils together to create a mural.

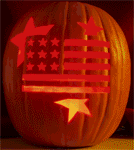
As for the shaded areas of the stencil, I go along the border with an exacto knife about half way into the pumpkin. After I have removed the stencil and the cut out parts of the pattern, I cut a cross pattern all over the shaded parts. Then I use a variety of small wood chisels with metal tips to chip away to the desired thickness. Then I light the pumpkin up with a flashlight and check to make sure the thickness is even and is showing enough light through.

Niki :lol:
User avatar
By Tkaraoke
#8344
I'm glad I went back through this article to read up on this method. because I've just started to collect things I'm going to need for my pumpkin carving sessions next month. Thanks for all of the wonderful tips!
User avatar
By Steve-o
#9488
I have to say I tried gluing the pattern to the pumpkin for the first time and was not that impressed. While it was quicker than the poking method, the paper just made it harder for the PM saws to do their thing. I tried Worm Food yesterday and it ended up being destroyed. Maybe it was my carving method or which parts I chose to cut out first, or the wall thickness, but peices kept breaking off. Needless to say, I had to make an "interesting" face out of the leftover cutouts. :? :oops:
User avatar
By S.A.M
#9491
Sorry to hear your carving trouble Steve-o, the only trouble I had with the glue method was the pattern coming unstuck but that was down to the glue choice.
I will say that it is a little tricky getting used to not seeing the pumpkin as you carve but as long as you keep the blade at a 90 degree angle to the pumpkin you shouldn't have too much trouble with carving through nearby bits, have a look at this page for some rather handy carving tips:
http://www.zombiepumpkins.com/tips.php

You do have to be extra vigilant of where you are carving and where the saw is, it takes time to get used to.

I've carved the Sandy Gauze and Jaws pattern using the glue method with no real problems both were carved using the Zombie Pumpkins carving tools, I don't know if that makes any difference or not.
User avatar
By cyberdman
#9492
Steve-o - I'd say your biggest problem is deciding to stick with using Pumpkin Masters Saws. Switch over to some real blades. I use X-Acto bladed knives exclusively. Cuts right through anything like butter.
User avatar
By Zombie Pumpkins!
#9497
X-Acto blades work on Michaels foam pumpkins, but what about a thicker foam pumpkin or the real thing? I think something longer (and with saw teeth) becomes necessary. Which could tear at the paper a bit more, no?