Thu Jan 16, 2014 5:44 am
#84966
Thanks everyone, for the kind words. A few replies...


It might take several tries to get the position and size just right. You need to experiment with the distance between the light and the stencil... and between the stencil and the wall... until the projected shape becomes the size you want it to be. For my photo, I made sure that the shadow of the piece of card stock filled the entire frame of the photo, so you couldn't see the edges of the card, which would spoil the trick.

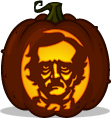
The portraits are by artist Daniel Horne. I had them professionally framed as a Halloween 2013 gift to myself. Hand carved frames, iridescent linen spacers, UV-protected anti-glare museum glass. Prized art pieces in my collections, I must say. Here are a couple shots of the trio of portraits, which also include the Count.Ajax wrote:...the portraits of Frankenstein's monster and his bride. Where did you ever find those?
I can do more elaborate tutorials on my techniques later, but this photo below should show you the basics of the Boo shadow. Basically... I drew a shape of Boo in a doorway on the computer, and printed it onto a piece of card stock. Then used an x-acto blade to cut out the shape to make a stencil. When photographing my Mike/Sulley pumpkins (with the camera on a tripod) I held the card stock stencil above the camera, and with my other free hand I aimed an LED pumpkin light at it. The shape was projected on the wall behind my pumpkins.Ajax wrote:My faves are sulley and mike with boo shadow... any chance of getting a tutorial on that technique?

It might take several tries to get the position and size just right. You need to experiment with the distance between the light and the stencil... and between the stencil and the wall... until the projected shape becomes the size you want it to be. For my photo, I made sure that the shadow of the piece of card stock filled the entire frame of the photo, so you couldn't see the edges of the card, which would spoil the trick.
I attached the plastic backdrop to the wall with many pieces of tape, trying to make it as taut and flat as possible. And when positioning lights, I just had to keep moving them around and aiming them in different ways until I saw no glare on the plastic (using the camera viewfinder to make sure there were no reflections seen).S.A.M wrote:How did you manage to use the plastic backdrops so well with Hessian Horseman? I've always had trouble with them reflecting my lighting so now I use the cloth ones which has limited my choices.
monstermash wrote:I totally appreciate the lengths you go to for a picture. It can be very tricky getting the pumpkin where you need it or getting the lighting or props in the right place.
I must say, the photo shoot setup and lighting is really a crazy mad dash, usually done in the wee hours on Halloween morning. Here's a "behind the scenes" shot of my "studio" during a photo shoot. I photograph all of my pumpkins, back to back. So for each shot, it's just a matter of wildly and imaginatively moving tables, props, and candles until I like what I see through the camera's viewfinder. The room becomes a mess, but the final photos I show look clean, so the work is worth it.mesmark wrote:Great job on those and I'm surprised you have the time to set up all of those photos.